


Don’t you ever just wonder, ‘What else can I do to make my room pop?’, it’s a question that comes across every homeowner’s mind. Some homeowners think about refurbishing their furniture. Some homeowners think about refacing or refinishing their cabinets. Some even consider the possibility of renovating their whole house. But what never pops into their heads, and what only very few homeowners will think of, is redecorating their crown molding.
Like any decorations included into your home, you need to decide the style that will be applied and what kind of design you want installed before you take out any necessary tools. Even when you consider doing the job yourself, crown molding is not the easiest installation to execute. It is a job that homeowners can finish themselves, but you may require an installer to come to your home and help you with the various tasks and materials associated with the plans.
It’s a regular enhancement to install new crown moldings onto the aesthetics of your home. In most cases, you may just need something as small as covering up a blemish, or maybe you just want an entire revitalization for your crown molds. In either case, homeowners will want the information about how much the project will cost and what goes into the project as well.
| Average Range | $1125-$6400 |
| Single Room Range | $250-$800 |
| Whole House Range | $2000-$12000 |
Before we even consider what kind of project you’re working on, you need to consider which parts of your home you’re making these installations. Are you only applying these decorative molds into a single room? Is the work going to extend throughout the whole of your home? To have a clearer outlook into what kind of budget you should maintain, think thoroughly about how much space you’re covering with this project.
Table of Contents
- History of Crown Molding
- Crown Molding Cost of Different Materials
- Benefits & Costs of Foam Crown Molding Installation
- Benefits & Costs of Polystyrene Crown Molding Installation
- Benefits & Costs of Polyurethane Crown Molding Installation
- Benefits & Costs of MDF Crown Molding Installation
- Benefits & Costs of Wood Crown Molding Installation
- Benefits & Costs of Plaster Crown Molding Installation
- Benefits & Costs of Metal Crown Molding Installation
- Types And Costs of Wood to Consider for Crown Molding
- Cost of Molding Installation By Type
- Cost Factors of Crown Molding Installation
- Labor Costs to Crown Molding Installation
- Crown Molding Installation By Decorative Style
- Crown Mold Painting Cost
- DIY Paint Steps
- Tools That Are Required for Crown Molding Installations
- What is Cove Molding?
- Installations Focused on Different Ceiling Types
- Replacing Your Crown Molding Costs
- Hiring a Professional or Professionals Through House Tipster
History of Crown Molding
Surprisingly, there’s a whole history of crown moldings that the average person wouldn’t know about. Although it may seem like just a decorative addition to your home, there is an artistic and historical value that is included with projects involving molds.
Quite a few ancient civilizations utilized the effects of crown moldings and decorative carvings. The Egyptians used two ornate methods, one was the cavetto and the other was the torus. It wasn’t just the Ancient Egyptians that wanted to use these architectural techniques to improve the appeal of their culture. The Greeks used something called the epikranitis, or what we’ve come to know as the wall crown.
The Greek method then inspired Roman architecture, carrying out these artisanal techniques to inspire the Corinthian style. Some of these moldings can actually be found in Rome and certain regions in modern Italy.
All methods are architectural mouldings that have become the staple inspirations to modern crowns that homeowners use today. Methods that have been carried out from tradition to tradition, culture to culture.
Crown Molding Cost of Different Materials
While the only option that seemed available for crown moldings was wood, there are many more options now available for you and many of the homeowners out there. Synthetic materials that are easily manufactured and shaped in the present-day can replicate the look of wood. However, although there are advantages that come with these different materials, there will always be disadvantages that lurk along the way.
Benefits & Costs of Foam Crown Molding Installation
There are two types of foam to consider when you look at the crossroads. There is the route of the polystyrene crown molding and there is the route of polyurethane foam crown moldings. Both have their advantages and both have their disadvantages.
Benefits & Costs of Polystyrene Crown Molding Installation
The first type of foam material is called polystyrene. Both foam materials are synthetic in creation and made by styrene monomer. This liquid petrochemical is a thermoplastic polymer that softens when heated and can then be shaped into a crown molding. The average range is about $0.50 to $3 per linear foot.
This crown molding material is a very lightweight foam and is simple for an installation. Homeowners have much more ease of mind when they realize that this material has foam-safe adhesive. Although there are these advantages, polystyrene unfortunately has the least appeal and elegance to its look.
Benefits & Costs of Polyurethane Crown Molding Installation
This foam material works in most crown molding installations, making it a very functional alternative for the materials in your installations. It is a less expensive material, yet retains stability and repels rot and insects. The cost of polyurethane as a material ranges between $2 to $4 per linear foot.
It is an eco-friendly material that endorses social conscientiousness. Compared to the other polystyrene crown molding, polyurethane is softer and can easily dent. For an installation like this, trying to manage this material with steady, gentle hands.
Benefits & Costs of MDF Crown Molding Installation
Pressuring sawdust and resin can produce Medium-Density Fiberboard, making it an inexpensive material to install crown moldings for homeowners. MDF ranges from $1 to $7 per foot. This is a less expensive option and was preordained to be stylized, designed to be painted.
Since fiberboard is occasionally manufactured by reclaimed wood chips, it can be considered a recyclable product. Because of the way the materials are produced, there are thin veneers that are best appropriated for stains. Due to the softness of the material, MDF is easy to get scratched and nicked.
Benefits & Costs of Wood Crown Molding Installation
No matter what kind of construction or renovation project you’re looking to install, wood will always be the industry standard. It’s an illustrative material that can be used for all kinds of jobs, and with wood there is so much versatility applied. Homeowners have a tough time figuring out just what kind of grade or what type of wood to look for. Since so many woods have various qualities to them, you need to determine which one is best suited for your crown molding.
If you’re looking to paint your molding and make it look warmer or cooler than it seems, then maybe you’re looking for a paint-grade pine. If you’re looking to stain your molding and give it the right textures for how you prefer the look, then maybe you’re looking for some kind of hardwood.
Within the variety of wood you’re looking at, the range of costs will probably be between $1 and $30 per foot, especially for large hardwood moldings. Depending on the kinds of wood you’re thinking of using, the range will narrow from the choices. Extravagance of such necessities will make that scope much clearer, and with the decision of grade, you’ll have a better understanding of prices. You should constantly keep in mind that molding and milling different designs are two different things and additional costs will be applied if there is a specific design you’re vying for.
Benefits & Costs of Plaster Crown Molding Installation
Unlike most of the materials that are listed on this article, plaster is infrequently found, and it is very detail-oriented to actually install. In fact, plaster is so rare that fewer plaster crafters exist today because it’s such a traditional material to use. Plaster, on average, is estimated to cost approximately $6 and $15.
Most cases, plaster is designed to primarily enhance your home’s space by being installed on higher ceilings. Elaborate plaster is typically installed above a two-story entryway; it displays the beauty of the natural craftsmanship that the material brings to your home. In some instances, plaster can even cost about $30 per foot, so it’s not an affordable option for homeowners with a certain range of their budgets.
Benefits & Costs of Metal Crown Molding Installation
This metal material is practically the most expensive out of the materials mentioned above. It ranges from $10 to $25 per linear foot. Metal crown moldings can be used for both interior and exterior aesthetics. There are different choices for your metal crown moldings, you can install the molding with steel, copper, or aluminum.
Any of these materials easily dent so this requires steady hands and careful eyes. You will need to continue being cautious from damaging the mold even after the installation is complete. Whether you’re doing this project yourself or you have the assistance of a hired hand, make sure that you can carry the amount of metal you’re handling and keep in mind that you’re going to need a metal cutting saw.
Types And Costs of Wood to Consider for Crown Molding
Since wood is such a common material that is used for home-related projects, it’s essential to know the cost breakdown for the types of wood there are to consider. Although we did say that metal is considered to be the most expensive out of the list of materials, depending on the kind of timber you decide to install, you could be looking to spend about $30 per linear foot.
There are many different wooden materials to consider, so think about the moldings that best fit your ideal spaces:
Maple & Costs
The color of maple is pale. But the color isn’t what should concern you because maple is an easier material to stain with darker colors. In quality of appearance, maple is, in all likelihood, the selection that homeowners who can’t afford finer woods tend to buy. The average range for maple is estimated to be about $2 to $5 per linear foot. And despite its low cost, it's a durable material with an ease to fully customize the look.
Cedar & Costs
A lighter grain with a lighter color involved, cedar is regularly the prime choice for interior layouts. It’s fair in durability and with its hues, cedar can offer a unique appearance for the homeowners who desire a lighter texture and shade for their space. Cedar also has the added benefit of resistance towards cracking and swelling, but on a regular basis, cedar must be stained and sealed. Although there is durability against physical damages, cedar will not face rot, moisture, or mold growth with stability.
The average price of cedar is estimated to be about $2 and can be about $6 per foot. Cedar moulding gives a traditional look that improves the overall aspect of the inside of your home.
Oak & Costs
One of the hardwoods that will be dependable in strength, oak is a heavier material but very easy to install. There are two kinds of oak to choose from, there is the red oak crown molding and the white oak crown molding. Both have very different price ranges and both have very different colors.
Red oak has a salmon-pink hue with medium grain and the range of cost is averaged between $3 to $7 per linear foot. A majority of rooms can arrange the crown molding, but be wary that exposure to moisture will negatively affect the material and wet conditions will make it decay.
Contrary to belief, white oak really doesn’t match its name. White oak, in truth, has a honey brown hue and retains a medium grain as well. It is quite a costly option because the range is estimated at about $6 and can reach up to $12 per linear foot. Although you can use white oak crown molding for both the inside and outside of your home, it won’t be able to endure the elements without the care of resistance from deterioration.
Cherry & Costs
If you’re looking for a lighter color that makes your house pop in appearance, and a finer grain, then cherry is the material you’d probably prefer. With the light pinkish color that cherry has to offer, the molding ranges between $4 to $7 per foot.
There’s a common conception of wine improving in taste as it ages.Cherry wood, as it ages, makes the wood transform into a richer, darker red. Through precision, care, and maintenance, cherry crown molding can actually be used for external projects, however, it is most suitable for interior projects instead.
Mahogany & Costs
Mahogany crown molding is probably the most expensive out of the other wood materials but there's a good reason for its highly applied expense. The estimate of mahogany’s costs can range from $10 up to $30 per linear foot. There is the option to choose a medium grain but there are options for a heavy grain instead.
This might be a material that outweighs metal in costs but its durability and its trustworthiness to get the job done is why many homeowners choose it. Although the difficulty will lie in trying to saw the Mahogany for your installation to be done, you can use the intended tools to make clean cuts.
It’s not only a durable wood but because it is essentially free of voids and pockets, it can resist wood rot.
Cost of Molding Installation By Type
Whether you’re installing a crown mold according to the hollow style or the three-piece style, the range that you’ll spend will most likely be about $3 to $15 per linear foot. The decision of choosing a style all depends on the design of your home as well. Determine the style of your home before you make any big installation decisions and determine the height of your ceilings. By evaluating the design of your molding, you can see just how the molding might match your home.
Architecture matters most in this part of your process in the installation of your crown moldings. Hollow crown moldings were made to keep your cables and wires from being visible. The average estimate ranges from $3 to $7. The way this molding design is made allows the combination between aesthetics and functionality.
The shape of the molding is hollow inside, hence the name, the wires and cables are put through the hollow space. You can install the design throughout your home and any guests who are prone to tripping over your cable lines, this is the preferred choice of design for homeowners who concern themselves with clumsy visitors.
One-piece crown molding design is the most common style that homeowners consider. The range in cost is typically $4 to $8, and this design is typically made of MDF. It is installed by using a single piece of trim. It is somewhat a mediocrity but it adds that little depth to your home that you’ll want featured around your halls, entryways, and rooms.
The two-piece design has the delicacy and detailed look that most homeowners are usually on the prowl for. There are two kinds of this design, there is the conventional style or the traditional style. The conventional style costs less with the estimate ranging between $5 and $10 linear foot. The traditional style costs a little more and ranges in cost between $7 and $12 per linear foot.
Two-piece conventional styles are the designs that are probably the most distinct crown molding designs after the one-piece. Essentially, it is the one-piece molding, except this one-piece is installed in reverse and includes an extra crown on the top. Two-piece traditional crown molds have a similar set-up. They typically leave an empty space in between where the homeowner will have the ability to switch up the colors by painting the void.
The next style to note is the three-piece crown molding, which is commonly installed in different styles and is installed by fastening the materials into one unifying piece. It is averagely ranged in costs between $8 to $15 per linear foot. Offering a post-modern look into your home, the three-piece crown molding type will add elegance and grace into the spaces of your property.
Cost Factors of Crown Molding Installation
Depending on the types of materials for your crown molds that you decide to purchase, your budget may need to be adjusted accordingly. For the completion of your crown molding installations, a crown molding profile is optional.
| Bead and Curve | $1.50-$5 per linear foot |
| Rope | $3-$10 per linear foot |
| Dentil | $4-$10 per linear foot |
| Double Bead | $5-$9 per linear foot |
| Leaf | $6-$12 per linear foot |
| Stairsteps | $7-$11 per linear foot |
| Egg and Dart | $8-$30 per linear foot |
| Garland | $13-$16 per linear foot |
| Ornamental Ovolo | $16-$25 per linear foot |
The bead and curve profiles are the designs that include a curving border with a small bead at each end from top to bottom.
The rope profiles are exactly what they sound like, there is a rope engraving that is molded onto your crown molding.
The dentil mold profiles resemble the shape of the rook piece of a chessboard.
Double bead molding profiles are designs for your crown molds that layer the bead and curve with a bit more complexity applied.
A leaf profile is exactly what it would look like, the engraving on the crown molding is reminiscent of leaves laid in a pattern.
Stairsteps molding profiles are designs that were popularized in the 1920s for Art Deco enthusiasts and were maintained in preference for contemporary homeowners.
The egg and dart profile is an architectural classic that was originally used for European homes. Historically, the classic profile was created during the Renaissance.
Garland profiles feature an entanglement of flowers and vines for its engraving. It tucks the engraving right underneath a rippled crown mold.
An ornamental ovolo profile is uniquely engraved but is principally installed using polyurethane foam crowns, with a curving top or what you refer to as an ovolo.
Labor Costs to Crown Molding Installation
To hire a professional for a crown molding installation, you’ll want to find carpenters. The costs are factored by either the amount of labor and materials that are required for the project that you want finished. Carpenters will charge you, on average, about $4 to $8 per linear foot but if you find a carpenter that wishes to charge you on an hourly basis, you’ll expect to spend at least $50 to $70 per hour. As a reminder, tell yourself that the portion of your budget spent solely on labor, should account for about 25 percent.
Crown Molding Installation By Decorative Style
There are different styles to consider when you decide to install a crown molding. Aesthetically and respectively, all of the decorative aspects in the different styles have a history behind them. These inspiring ideas for your molds won’t generally affect the cost by too much, the cost will look more like an additional fee rather than a colossal bust into your expenses.
Craftsman Style
Inspiration behind this style was from multiple historical movements like the Arts and Crafts, Bungalow, and Prairie movements. Refusing the notions brought by the Victorian styles and wishing to emphasize the man-made or machine-made concept, the Craftsman was born. The Craftsman style is a versatile decorative approach for both the inside of your rooms and the outside of your homes.
There are three different styles to note for the craftsman: the classical, the bullnose, and the beaded & bullnose. Each of these sub-styles are somewhat unique yet similar. With these selections, you can make the moldings look newly constructed.
Traditional
Simplicity and beauty is what defines the traditional style of crown molding designs. Having the capacity to basically fit anywhere in your home without a single worry, this is a style that can be installed from any part of your home, internally or externally. Traditionally, the design was made out of wood but nowadays, with the rise of synthetics, the traditional style can be made with a variety of other materials.
Victorian
The crown molding that was rejected by different movements, this was the design that was made up of different and elaborate amalgamations of shapes and profiles, all strangely blending into a single tapestry. Victorian architecture was known for its applications of eccentric, self-titled romanticism yet relied on the rational designs from the Georgian era.
Although stimulated by the Georgian-style architecture, the Victorian style was a depiction to turn heads and admire the captures of the artisanal look. Keep in mind that this design is best-suited for tasteful areas of your home’s space.
Art Deco
With a mixture of traditional geometric patterns, the art deco style is most common with the artwork and culture of indigenous peoples. Today, more modernized versions of the designs have been developed, adding interest and artistic value to the rooms in your home. Through extreme versatility in mind, the art deco crown molding frees up more willingness to install the molding along the borders of your ceilings. Art Deco can bring the boldness that lasts in the outer appeal of your home.
Mid-century modern
The style and design of the mid-century modern crown moldings outlines the cleanliness of the mold’s scores and functions with simplicity in shapes. It’s versatility is what improves its reputation and helps the floor plans to feel more open and shed more light into the areas provided in your home. It actually heightens your shorter ceilings in appearance.
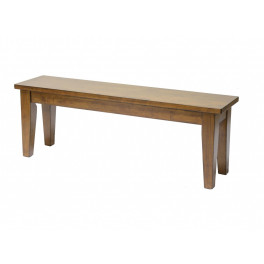
Farmhouse Style
If what you’re looking for is only simplicity, then what you’re probably searching for is the farmhouse style of crown molding. To properly highlight the uniqueness of your home, you need to know what kinds of crown molding installations will work best with the architectural integrity of your spaces. The farmhouse style is multifaceted in the different materials available in your inventory of crown molding ideas. Although you have your choice of synthetic material, wood probably would work best with the farmhouse style.
Colonial Style
Originally from the early 18th century, the colonial style became the norm of building design throughout generations until the early 19th century. It is easier to describe the Colonial style as a classical version of the Georgian designs. Best distinguished as a type of molding stacked by diverse lines collaborating with different textures, the colonial style is most prominent in Boston where colonial revival is still preserved in certain housing.
Greek
As stated above, crown moldings in early civilizations were inspired by artistic visionaries. With the vast array of features, the recognition of Greek architecture pierces through the modern crown moldings that makes it so discernable. As the emigration of architects began to move further along, the movement of artwork based itself into the ellipse shape rather than the circle-like shape.
Specialized intricacy became the typical standard rather than the traditional expectations that people became accustomed to. Greek crown molding became one of the many options that offered to draw up more and more homeowners to install the Greek style amongst the rest.
Arts and Crafts
Arts and Crafts, although the style may sound like you’re back in kindergarten, is the focal point for crown moldings regarding Craftsman-era homes. It became a renowned style and was birthed by the Arts and Crafts movement. As it became more and more reliant amongst homes, the design became a household standard for crown molding installations.
Predating even the Craftsman style, the Arts and Crafts style of crown molds held itself together through eight decades, and this is one of the precursors as to why the two look so similar. However, the difference between the two is that the core concept of the Arts and Crafts crown molding was that the style be built by architectural methods rather than machine harboring designs.
Crown Mold Painting Cost
Installing your crown molding can take hours or even days, depending on the size and designs you’re planning to start your project. Complexity will always build hurdles to overcome along the way. To truly succeed in enhancing the vibrancy of your space, you need to understand the costs and methods required for painting your crown molding. The bleak and bland colors of your molds can only be improved by splashing the right dyes and hues.
Although most people decide to keep their crown molding white and maintain its original color, there are many ways to gloss it over. Here is some advice on how you can create a balance in contrast and detailing. Learning how to emulsify your palettes and delineate different shades is what improves the allure of your halls and rooms.
There are two kinds of painting methods: hand painting and spray painting. With the spraying method, you’ll need to paint your crown moldings before the installation can begin. If you decide to use the hand painting method, you can paint before or after the installation. But like the spray painting method, it is highly recommended to paint after the installation is complete. Before you do anything, you should try to mediate which finish options you have available for your design and planning.
There are two choices that homeowners prefer: semi-gloss or high-gloss. Since either choice can endure being washed on often, these are the choices that people go to when they complete their crown molding installations.
Although there are DIY projects that involve painting the crown molding, homeowners need to know that the best results come from the best professionals. Whatever paints you decide to purchase and whether you hire a painter or not, the costs will most likely range from $150 to $600. The only material for crown moldings that you absolutely need to paint is MDF. It’s optional to paint over the other materials but it’s imperative that you paint MDF if that is the material you decided to install.
One of the greater options available for you is stained wood crown molding which offers a more naturalized look for your space. If you’re opting into painting the crown molding yourself rather than paying for a professional painter to come into your home and do the job for you, then here are some steps you can take to DIY.
DIY Paint Steps
The job of creating an aesthetically pleasing interior space must be planned out like all home-related projects. Especially if you want the job done correctly, you need to know these things before you even lift a finger.
The first step into painting your own crown molding installations is to pick out the color palette. Most homeowners decide to go with neutral colors for the trim and molding to blend with the room’s walls, windows and doors. And by doing so, they can paint a more cooperative color scheme. One tip is to paint the trim a bit darker than the color on your walls. By applying the slightly darker hue of the tone on your walls, this will make the process of choosing that much quicker.
The second step is to choose the paint type. By choosing a finish, you can easily apply whatever is necessary for your mold and simply clean everything up after you’re done with painting. There are quite a few finishes to choose from, and the most common options are typically durable flat, flat enamel, eggshell, satin, semi-gloss and high-gloss. The best options for homeowners to choose, however, are semi-gloss and high-gloss finishes. Semi-gloss has a higher gloss level than the satin, but the shine cannot be compared to the high-gloss finish.
Third step involves choosing your brushes. To apply the paint on your crown molding, you can use a high-quality enamel or varnish brush. Since they can hold more paint, you can paint your molding with ease and won’t leave any sign of brush strokes. If you decide to choose brushes with flagged tips or tapered edges, you’ll be able to paint those annoying areas in the corners that are difficult to reach. Also consider larger brushes, that way, you can use them for wainscoting, paneling, and doors.
Next part of this process will involve actually prepping your paint. This step takes a little more time and effort, but inevitably makes your process so much easier to execute. The results of doing this will help your paints last longer overall, so preparing those colors will create a spectacular effect. It’s not necessary to keep this in mind but the surfaces of whatever you’re painting needs to be clean. Otherwise the dirt, grime, or dust will be painted over, leaving mold or mildew to grow. This is why it is suggested that you hire a professional so that mistakes can be avoided.
To thoroughly clean your walls or crown moldings, use a sponge and dip it into a phosphate-free cleaner mixed with warm water. This way, you can clean the woodwork without having any repercussions to concern yourself with. Certain areas of the home need another method to take care of this issue. Crevices will need a soft brush, while tougher stains will need a more abrasive cleaning pad. You should carefully rinse your surfaces and use an absorbent towel to dry thoroughly.
Any damages to your room can be sanded with sandpaper on a rubber sanding block. Sanding sponges are for oddly designed surfaces. Wood fillers will be more effective for spaces with severe damages. Glossy sheened woodwork needs to be dull if the paint can be adhered to with an effective brush-on deglosser. You’ll most likely need a vacuum to remove the sanding dust that remains as debris.
Even when all of this is done, you need to remember that there is still the priming of your paint. Pour your primer into the paint tray and use your paintbrush to apply the primer around the edges of your wall. Use a stepladder to make sure that you don’t accidentally trip. Apply just one coat or two by using a small paintbrush and once you do, make sure to let the coat or coats dry. To make sure that the coat is completely dry, wait overnight to ensure the whole process won’t need to be repeated.
Keep in mind that you’ll want to keep a few feet in distance from where you’re painting. If you want the best results, drips and splatters will need to be avoided. This will be the surefire way to finish the process. Now, paint away but remember, accidents will happen with a job like this, painting is a messy process and you’re sure to have at least a few drops or even whole brush strokes on surfaces that you didn’t intend to coat. To fix these kinds of problems, you’ll need to use denatured alcohol or a cleaner to remove the dried up spots.
Finally, all you’ll need to do is accomplish the clean-up. To start this, you’ll need to thoroughly rinse your brushes with water. Once the water runs clear, place your brush or the roller you’re using and remove all those liquids.
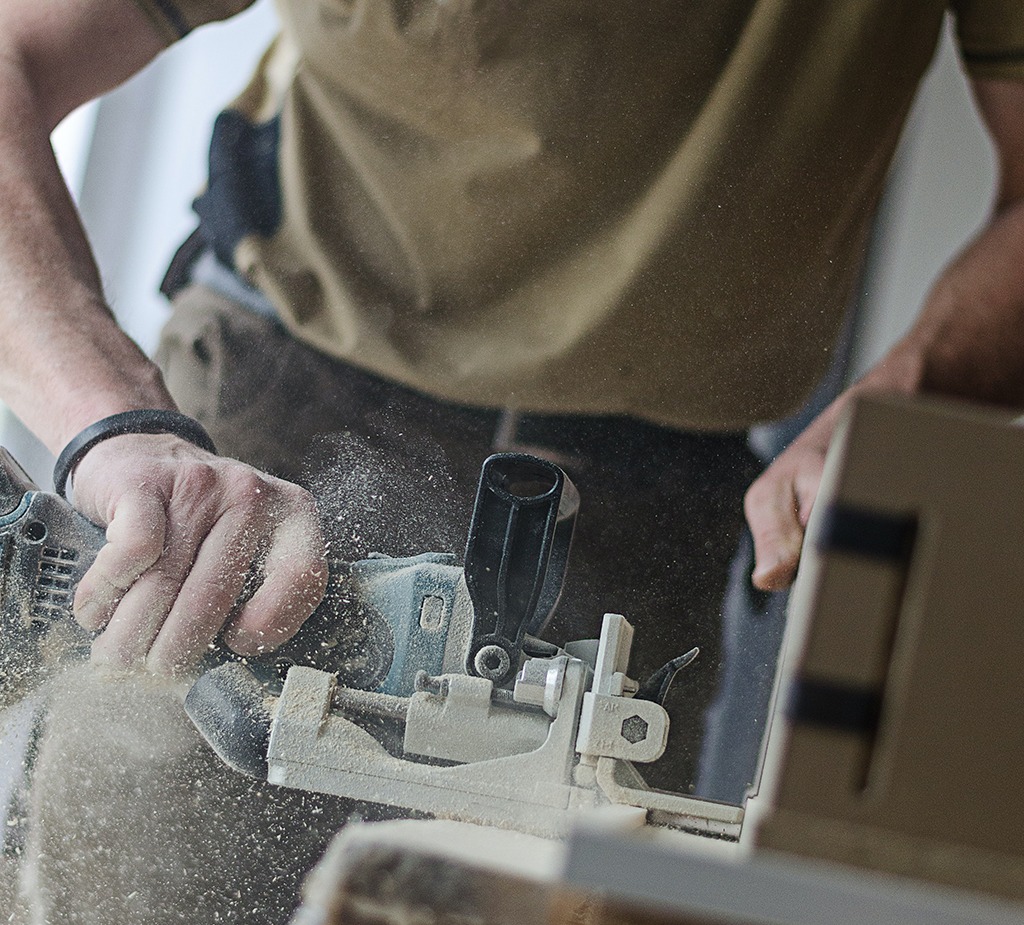
Tools That Are Required for Crown Molding Installations
Projects that involve complicated materials, like crown moldings, will always have a necessity for the right kind of tools. There are two kinds of saws to look for crown molding installations, especially if you’re doing the project yourself. There is the compound miter saw and the thin-blade coping saw.
Miter saws allow you to cut wood in a variety of different angles. It has a mounted blade with its swing arm. The saw pivots in a left or right motion and produces angled cuts. The difference between this and the compound miter saw that is mentioned in this section, is that compound miter saws function with a single-directed tilt to produce beveled cuts.
The thin-bladed coping saw is meant to cut curved areas in your woodworking. Although you could just turn on a power tool to get the job done, if you want real precision, the coping saw works best. A coping saw is C-shaped with a steel frame, used with pivoting holders. Commonly, the saw is used for fast, tight curves and helps fit molding together by positioning the miter joint in between the different cuts.
What is Cove Molding?
There is an ancient method that we discussed in the sections above, the Egyptians called it the cavetto. We call this modern version, the cove moldings, and they are essentially concave wood moldings, connecting an intersection between two adjacent parts of your ceilings. These molds are regularly available in smaller widths and won't have much variety applied to them.
Cove molding options for these installations will most likely range in an estimate of $4 to $8 per linear foot. From what you’ve read, you should know that crown moldings hold a more complex edge in appearance than cove moldings. However, the disadvantage with this is that there is limited usage for crown moldings and won’t work for installations involving bottom corners.
Installations Focused on Different Ceiling Types
Do not mistake yourself with this misconception that ceilings are universally the same. There are many different kinds of ceilings to think about when you’re installing your crown molding. Prices for crown molding installations done for the intricacies of your ceiling types will range from $8 to $30 per linear foot. You need to know how complex the kind of ceiling you have before you make the decision of executing the installation.
Cathedral Ceiling
Sloped ceilings are slightly different to install crown moldings, that is to say, they are a little more complicated to install than the other crown moldings that are discussed in this list. With the addition of installing larger pieces of the molds, homeowners need to know that the triangular transition piece is the apex connector. To ensure the fitting of a steep incline of a vaulted ceiling, you need to have them professionally or at least cut in a particular way.
Uneven Ceiling
Level isn’t pivotal to the installation of your crown moldings, although the process is somewhat different, there are still ways to make sure your mold fits. A surefire method of properly securing your crown is to combine multiple profiles, ultimately minimizing any caps that may form on your uneven surfaces. One other way to avoid miscalculating the level of your crown and ceiling is by attaching your mold to small diagonal blocks.
Coffered Ceiling
If you’re unsure what coffered ceilings are, look up and describe what kind of ceiling you have. If the description is flat and even, then chances are you have a regular ceiling, but if your description is that the ceiling is paneled and has grid-like rows, then you have coffered ceilings. Typically, coffered ceilings are for traditional enthusiasts, admirers of different architectural styles. In fact, the French word for box is coffers.
Replacing Your Crown Molding Costs
The replacements for your crown molding is very different from the installation. This is due to the fact that you’ll have to bring in all-new materials and products back to the table and reinstall everything back again. Overall, you can redo the whole process again, but it’d be that much simpler to call your local carpenter instead.
The process of taking out your old crown molding will not only take a huge chunk of time but you might face further damages and take on more frustration from any misplaced desecrations around your home. In a broader sense of the costs, replacing your old crown molding will estimate at the range of $0.50 to $1.50. The process will initiate the removal of the crown mold so the range will apply for each linear foot that needs to be replaced.
Adding on top of the average range of costs with removing your old installation, you’ll need to spend your dough on the new materials and the labor for reinstalling everything again. Your local carpenter will typically charge you around $4 to $8 per linear foot. And this range will differentiate according to the places you need the replacements for. So choose carefully on which professional you decide to hire for the replacement of your crown molding.
Hiring a Professional or Professionals Through House Tipster
Homeowners prefer to retain the appearance of the space within their homes. This is especially the case when an allotted period of time is applied. However, in that long pocket of time, whether it’s sooner or later, your crown molding will either need to be replaced, newly installed or physically altered. It is knowing how to do these things and the costs applied that will eventually traverse their way back to you. This will act as half the battle.
And one of the many considerations that you should account for is how you can find a professional that can conclusively aid you with the long process of installing, replacing or removing your crown molds. And although you could probably do it all yourself, it can be quite a tedious list of tasks to fulfill, consuming hours, or most likely days of your time. Within the extent of your written notes and research, you’ll begin to wonder how you can find the perfect professional for these jobs.
As stated previously in many other articles that have been written on this site, all of the labor that stacks along with a DIY can be quite stressful but fret no longer, that stress can easily be relieved. So think about hiring the professionals located near your area! Find multiple estimates by checking out House Tipster, and choose the perfect professional for your home repair needs. How much does it cost to install kitchen cabinets? Find out from professionals near you!
Featured image by Annie Gray from Unsplash


