


Wine has a dual purpose: It’s great to drink and can serve your home as a decorative piece. However, figuring out how to showcase your prized collection can be difficult. That’s where we come in! The ultimate unique wine display is more cost-effective and easier to build than you think. Using simple, unexpected materials brings a special flavor to your space and boosts your “inner builder” confidence. For this wine rack, we will use wood crates and galvanized pipes. Yes…...wood crates and galvanized pipes!
To get started, find the ideal space, like a niche in your kitchen. Then, take measurements of the space where you wish to display your masterpiece. Next, we need to create a shopping list.
You will need:
For the Brackets
- Eight half-inch-by-12-inch galvanized pipes
- Six half-inch galvanized flat mounts
- Two half-inch galvanized tee fittings
- Two half-inch galvanized elbow fittings
- About 30-35 2-inch wood nails


For the Shelving and Wine Rack
- Two wood crates
- One 12-inch-by-36-inch shelf
- White paint and paint brush
- Water
- Black spray paint
- Acetone (like nail polish remover) or paint thinner
Note: The sizes for all of these parts can vary and be adjusted according to the size of your space.
Now that we have our items, let's get building!
Galvanized piping usually has a greasy substance on it that needs to be removed for the paint to adhere. Use the acetone or paint thinner to clean all the greasy substance off the pipes.
Next, we want to assemble the brackets. Start by screwing one 12-inch pipe into the flat mount on one end.
Attach the tee fitting to the other end of your 12-inch pipe.
Screw two additional 12-inch pipes into the open areas of the tee fitting pipe.
The 12-inch pipe that sits horizontally off the tee fitting will then have the flat mount attached to its open end.
The last 12-inch pipe off the tee fitting will then be attached with an elbow fitting.
Attached to the elbow fitting, will sit another 12-inch pipe.
The open end of the last 12-inch pipe will be screwed into a third wall mount.
Using the rest of your piping supplies, repeat the same assembly.
Now that we have our brackets assembled, it’s time to paint them.
Next, we have to prepare the wood crates. For this display, we are going to whitewash the wood crates. To do that, mix one cup of paint with a half-cup of water. If you don’t want to measure, mix your paint and water to have a milk-like consistency.
Using your paint brush, apply your paint mixture to the wood crates.
Now that all pieces have had time to dry, next we mount them to the wall. Before mounting your brackets, you first need to find your wall joist or stud. To do that you can use a stud finder.
Studs are typically 16-inch on center, so once you found one, measure about 16-inch from that stud and you should find another stud. Now that we found the studs, we need the fix our brackets to the wall. Using the 2-inch screws, fix each flat mount to the wall, inserting four screws in each mount. Repeat this with the other bracket.
Once your brackets are in place, insert your 2 wood crates and fix them to the wall using 2-inch screws.
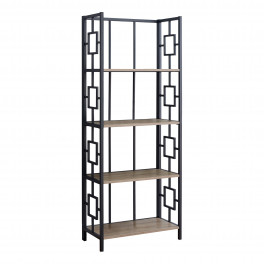
After you have secured the wood crates, place your shelf on the second layer of your bracket. Your finished product should look similar to this:
Add some wine coolers for your white wines and you have the ultimate wine bar in your kitchen!
This showpiece will have your family and friends asking how you did it! Now that you have built your own wine storage, kick back and enjoy the fruits of your labor with a glass of wine.


