


If you want to know how to install crown molding, the first thing you should know is that it's a job worth doing. Crown molding can truly be the “crown” on a beautiful room, and it's great for increasing your home’s value. The key to crown molding instillation is knowing that this is a job where you’ll need to have the right tools and the right amount of patience. These tips can get you going and help ease the more daunting parts of a crown molding project.
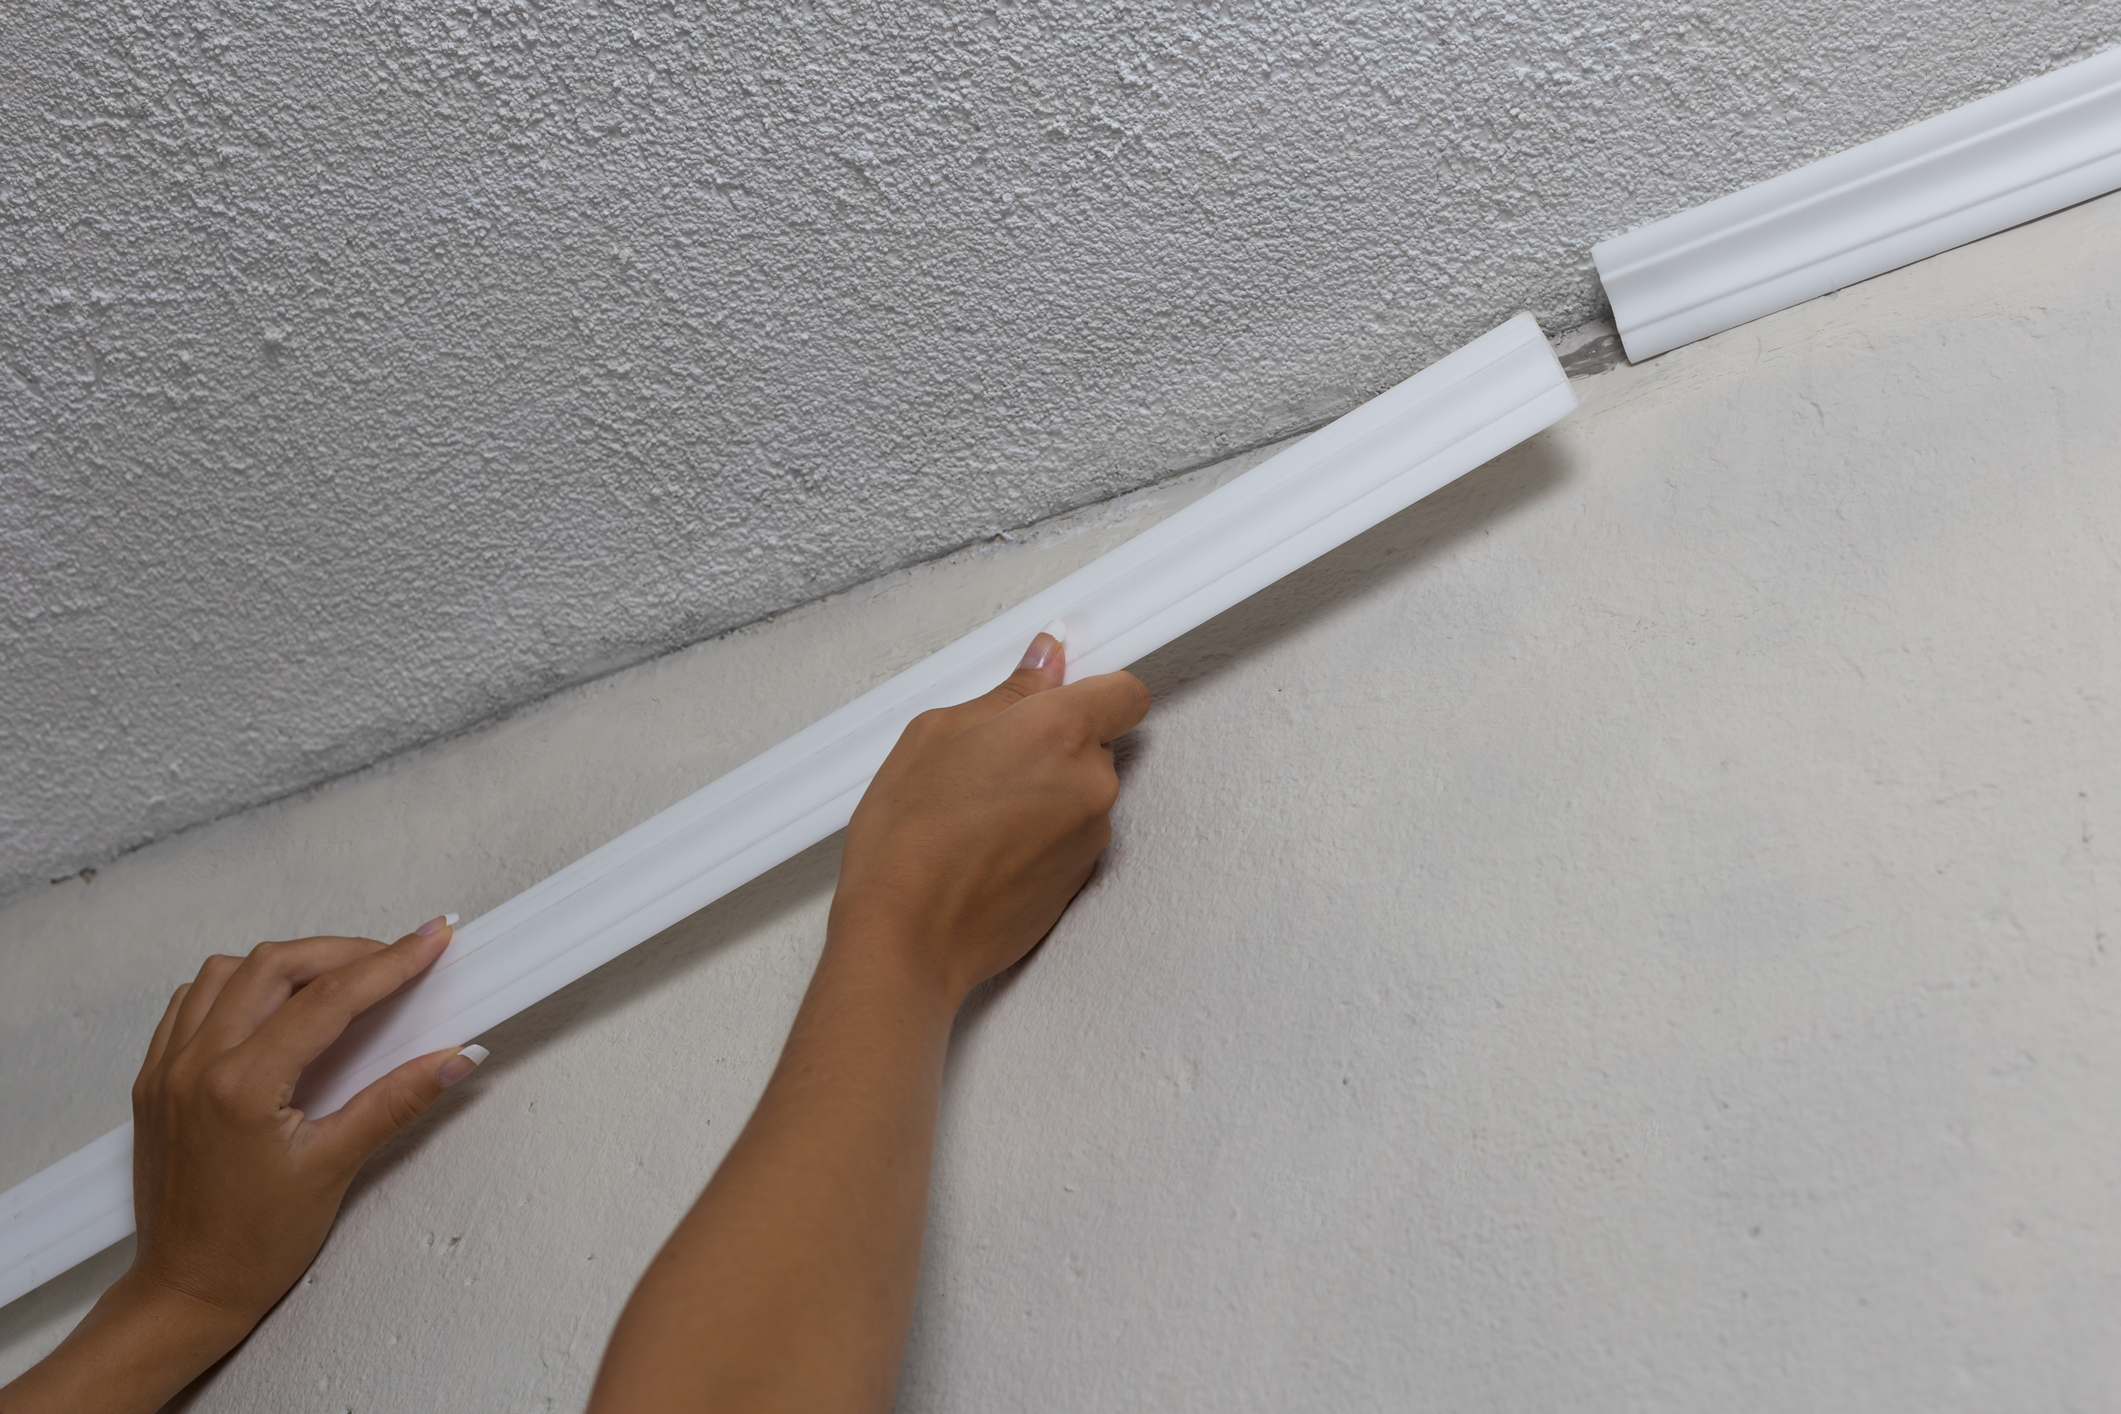
Photo by Yardesign on Dreamstime

Tools You’ll Need
The cuts required for crown molding are best made with a coping saw and miter box if you’re a beginner. This gives more room for error than a miter saw. If you can get or borrow a power miter saw, you’ll get the best of a clean cut.

Photo by Babich Alexander on Shutterstock
You’ll also need paintable caulk and caulking gun, tape measure, hammer and nails, a wood file, and a sturdy ladder. To make the perfect cuts, an adjustable angle measuring tool is a great help. This will precisely measure the angle of your corners — they are rarely a perfect 45 degrees — and eliminate large gaps and wasted molding pieces. You’ll use the measured angle from your walls for all your miter cuts.

Photo by noprati somchit on Shutterstock
Choose the Best Molding
Real wood molding is on the expensive side, so if you’re installing in living space you can go with molding made of MDF (medium-density fibreboard, a type of particle board made of small particles of wood). MDF molding is a blend of wood and resins that comes primed and ready to paint.

Photo by rustamank on Shutterstock
If you’re installing in a bathroom or kitchen, you’re better off using real wood because it is less likely to warp from the extra humidity in those rooms. If your plan is to stain the molding, you’ll need the real wood option. The easiest to cut and fit are pieces with the lowest profile and detailing. There are plenty of great options at your favorite home store.
Cut the Corners
This can be the toughest part of the whole job and has to be done first. Outside corner pieces are just mitered at an approximate 45-degree angle and should fit together nicely. The inside corners have one piece cut at an approximate 90-degree angle (straight cut), and the other at an approximate 45-degree angle.
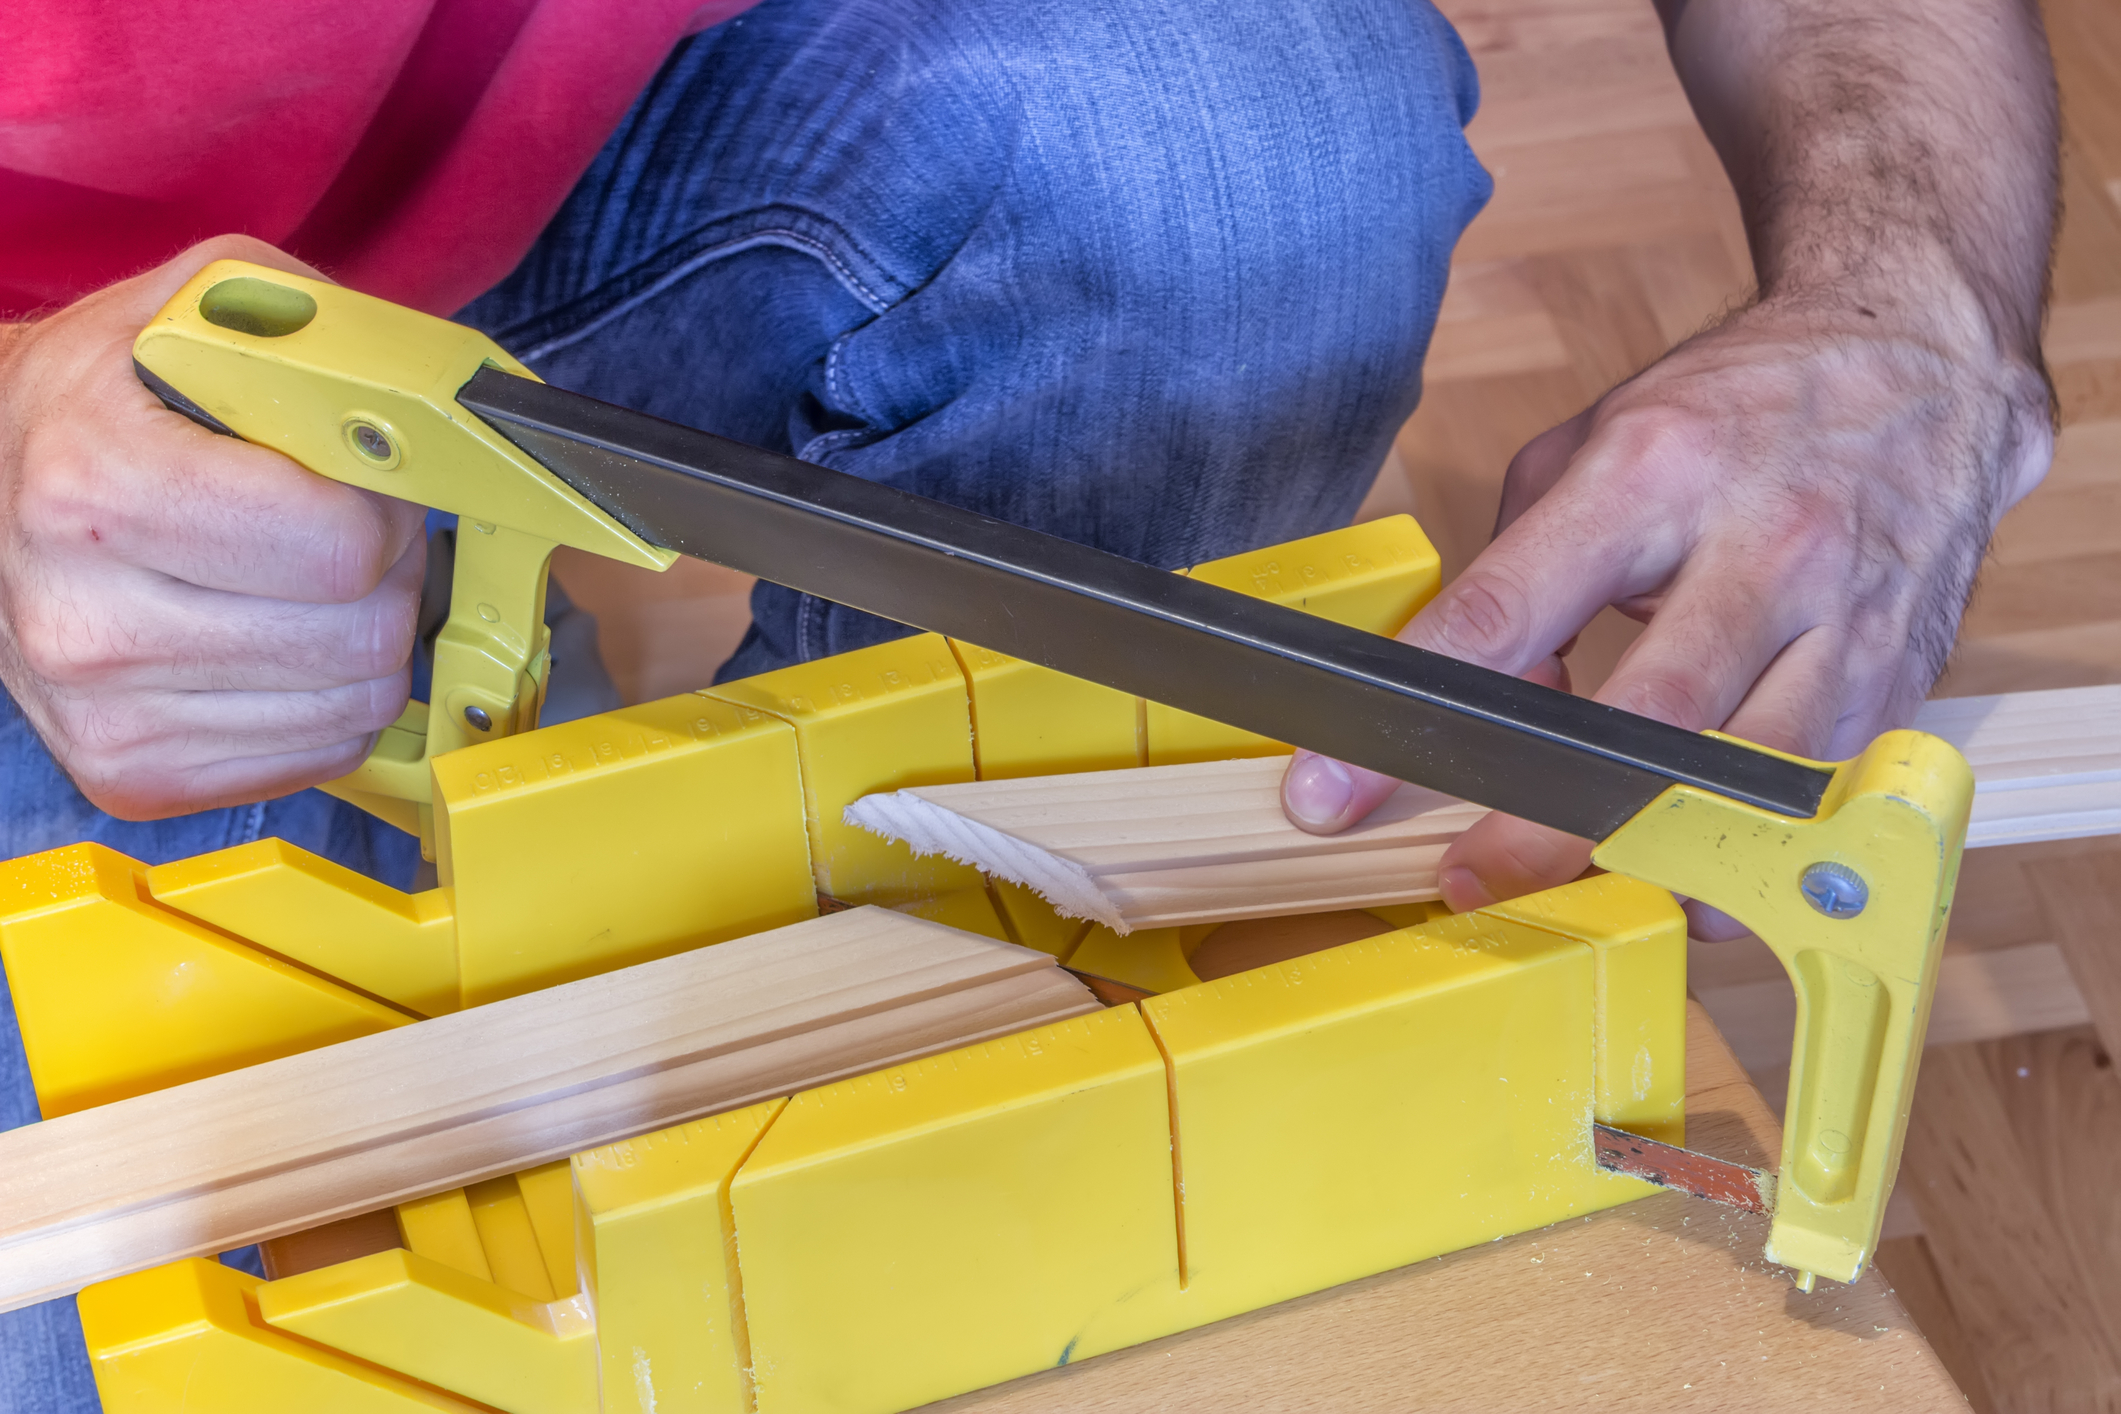
Photo by kalpis on Adobe Stock
You’ll immediately see there’s more work to do to get a good inside corner fit. Using a coping saw, you’ll trim the underside of the 45-degree angle cut piece. You can supplement the coping work with a wood file so there’s no chipping of the thinner edge of the molding. Recheck the corner fit as often as needed as you file down the higher spots. Small gaps can be filled with caulking, so there’s some room for error here. Here’s the good news: Home centers that sell molding have corner pieces assembled and ready to use.
Crown Molding Installation
Once your corner cuts are done, they’re ready for the wall. Use nails to install the molding, and fill the resulting holes with caulk. Gaps in the molding joints need some caulking as well. Just be careful to wipe away any excess.

Photo by yunava1 on Adobe Stock
Molding pieces can be too long to hold on your own, so have someone help to make the work easier and also to get a tighter fit, especially when first figuring out how to nail crown molding. You will probably have to cut some small pieces to fill in along each wall, and you’ll want to make sure to fill the resulting seams well.
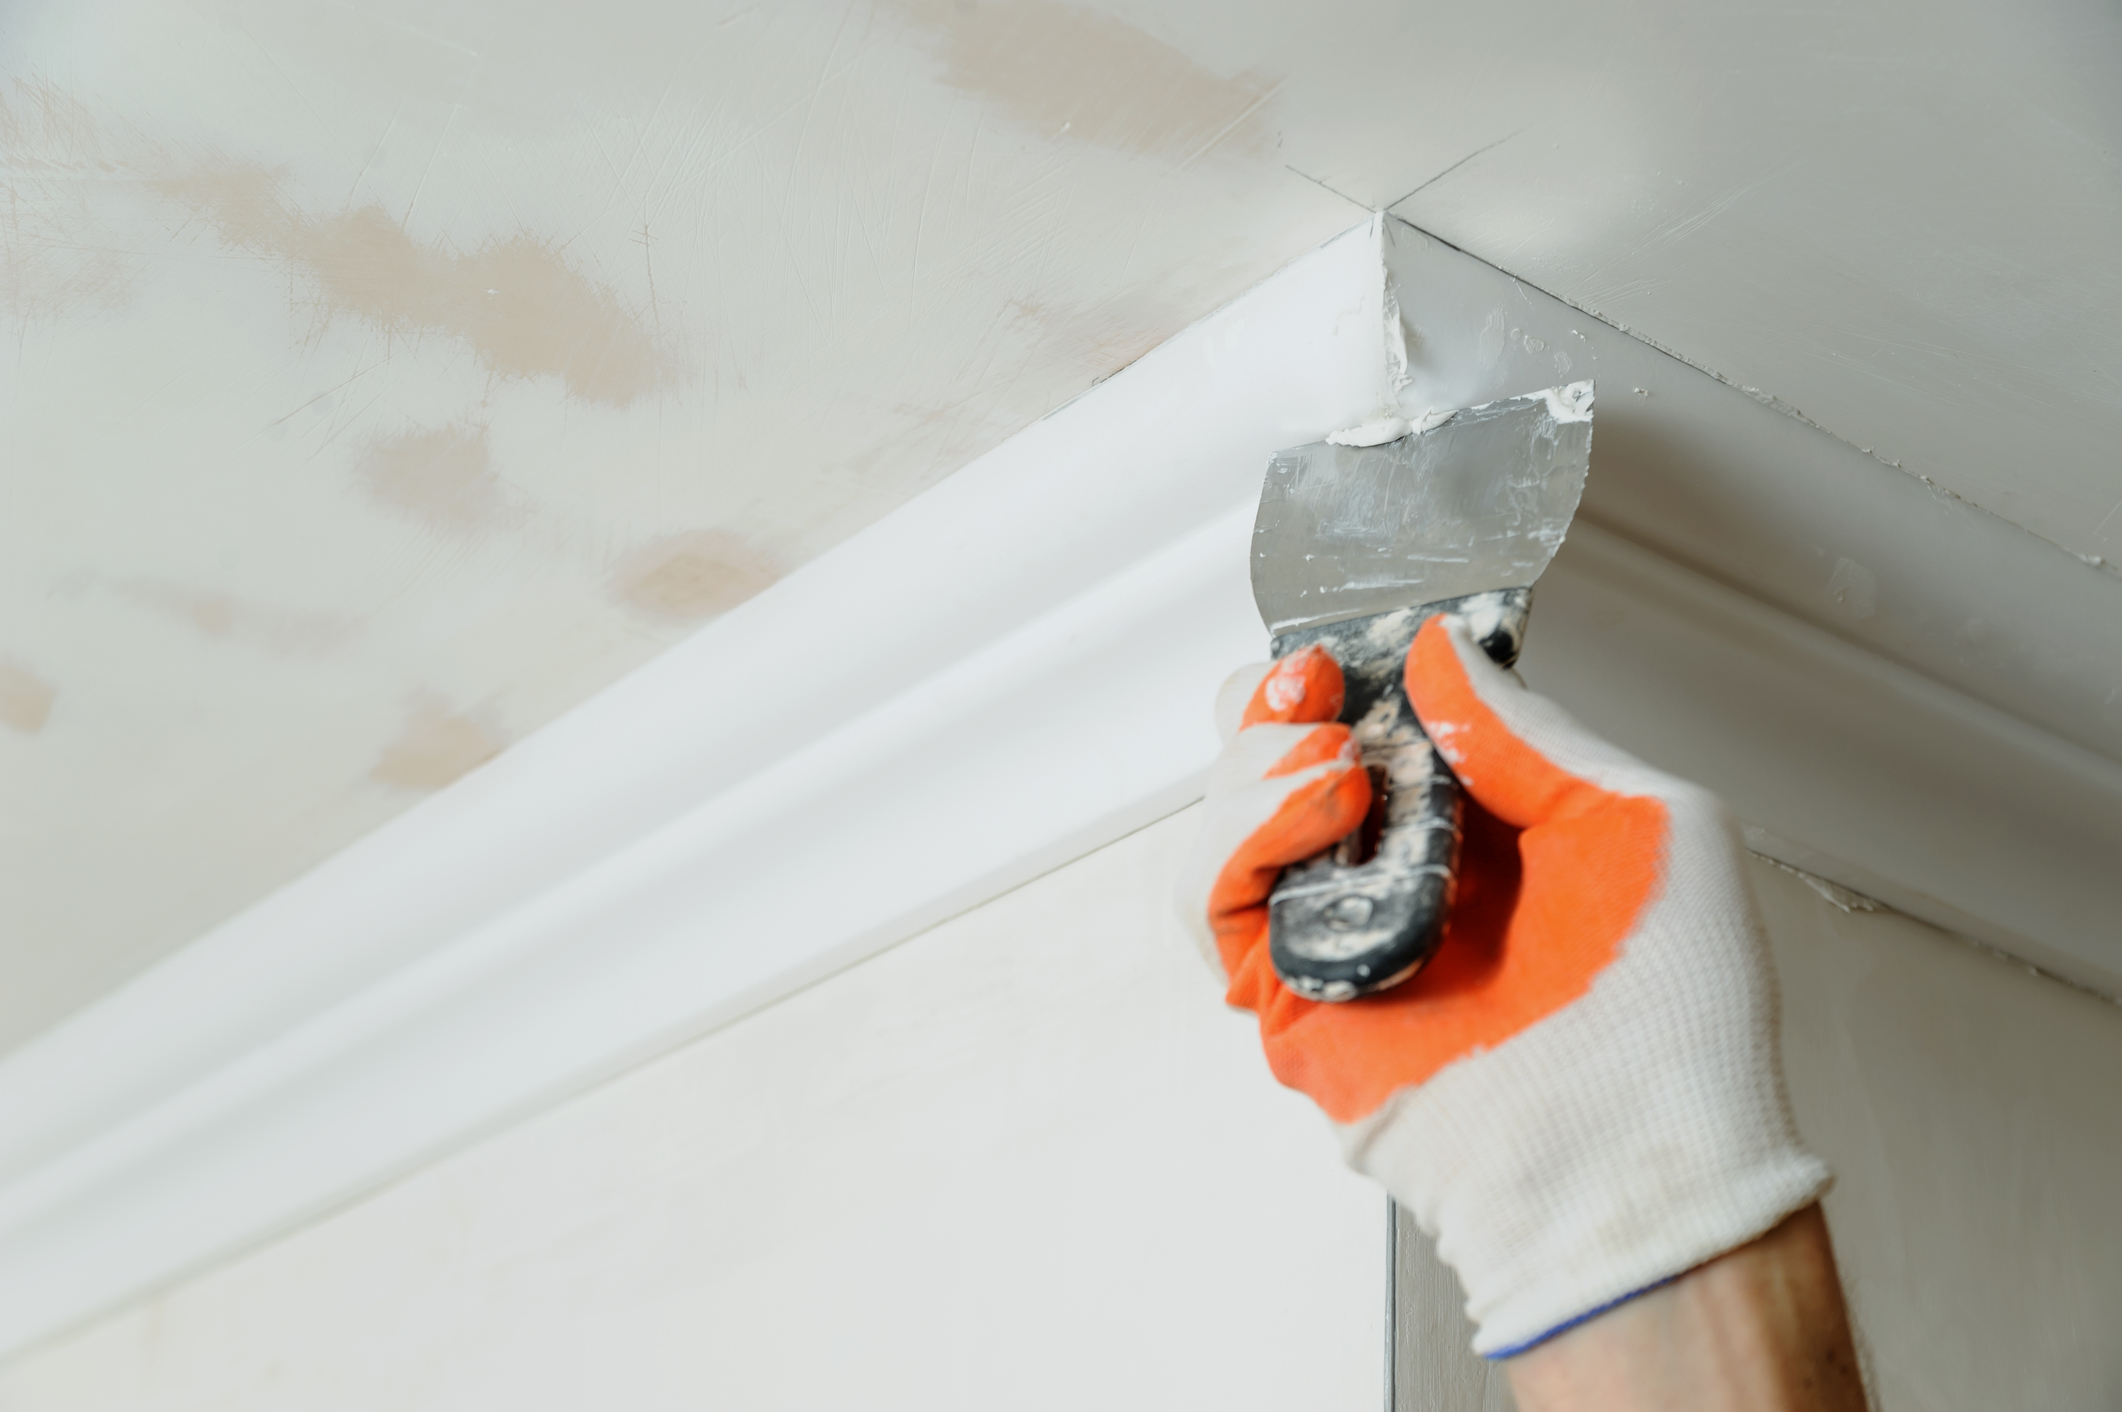
Photo by DUO Studio on Shutterstock
If you’re using real wood molding to stain and varnish, you’ll want to do that first before attaching. It’s a bit harder to cover gaps in stained wood, but caulking comes in a variety of colors to assist you. As long as you used paintable caulk, you’ll find a good match to cover what you need. If you’re painting, simply use painter’s tape to get clean lines.
The sometimes-frustrating work of installing crown molding will pay off when you see the beautiful, finished project. It’s an inspiring detail which makes any room better. Just be careful who you show it off to because they might beg you to do the job again at their house!
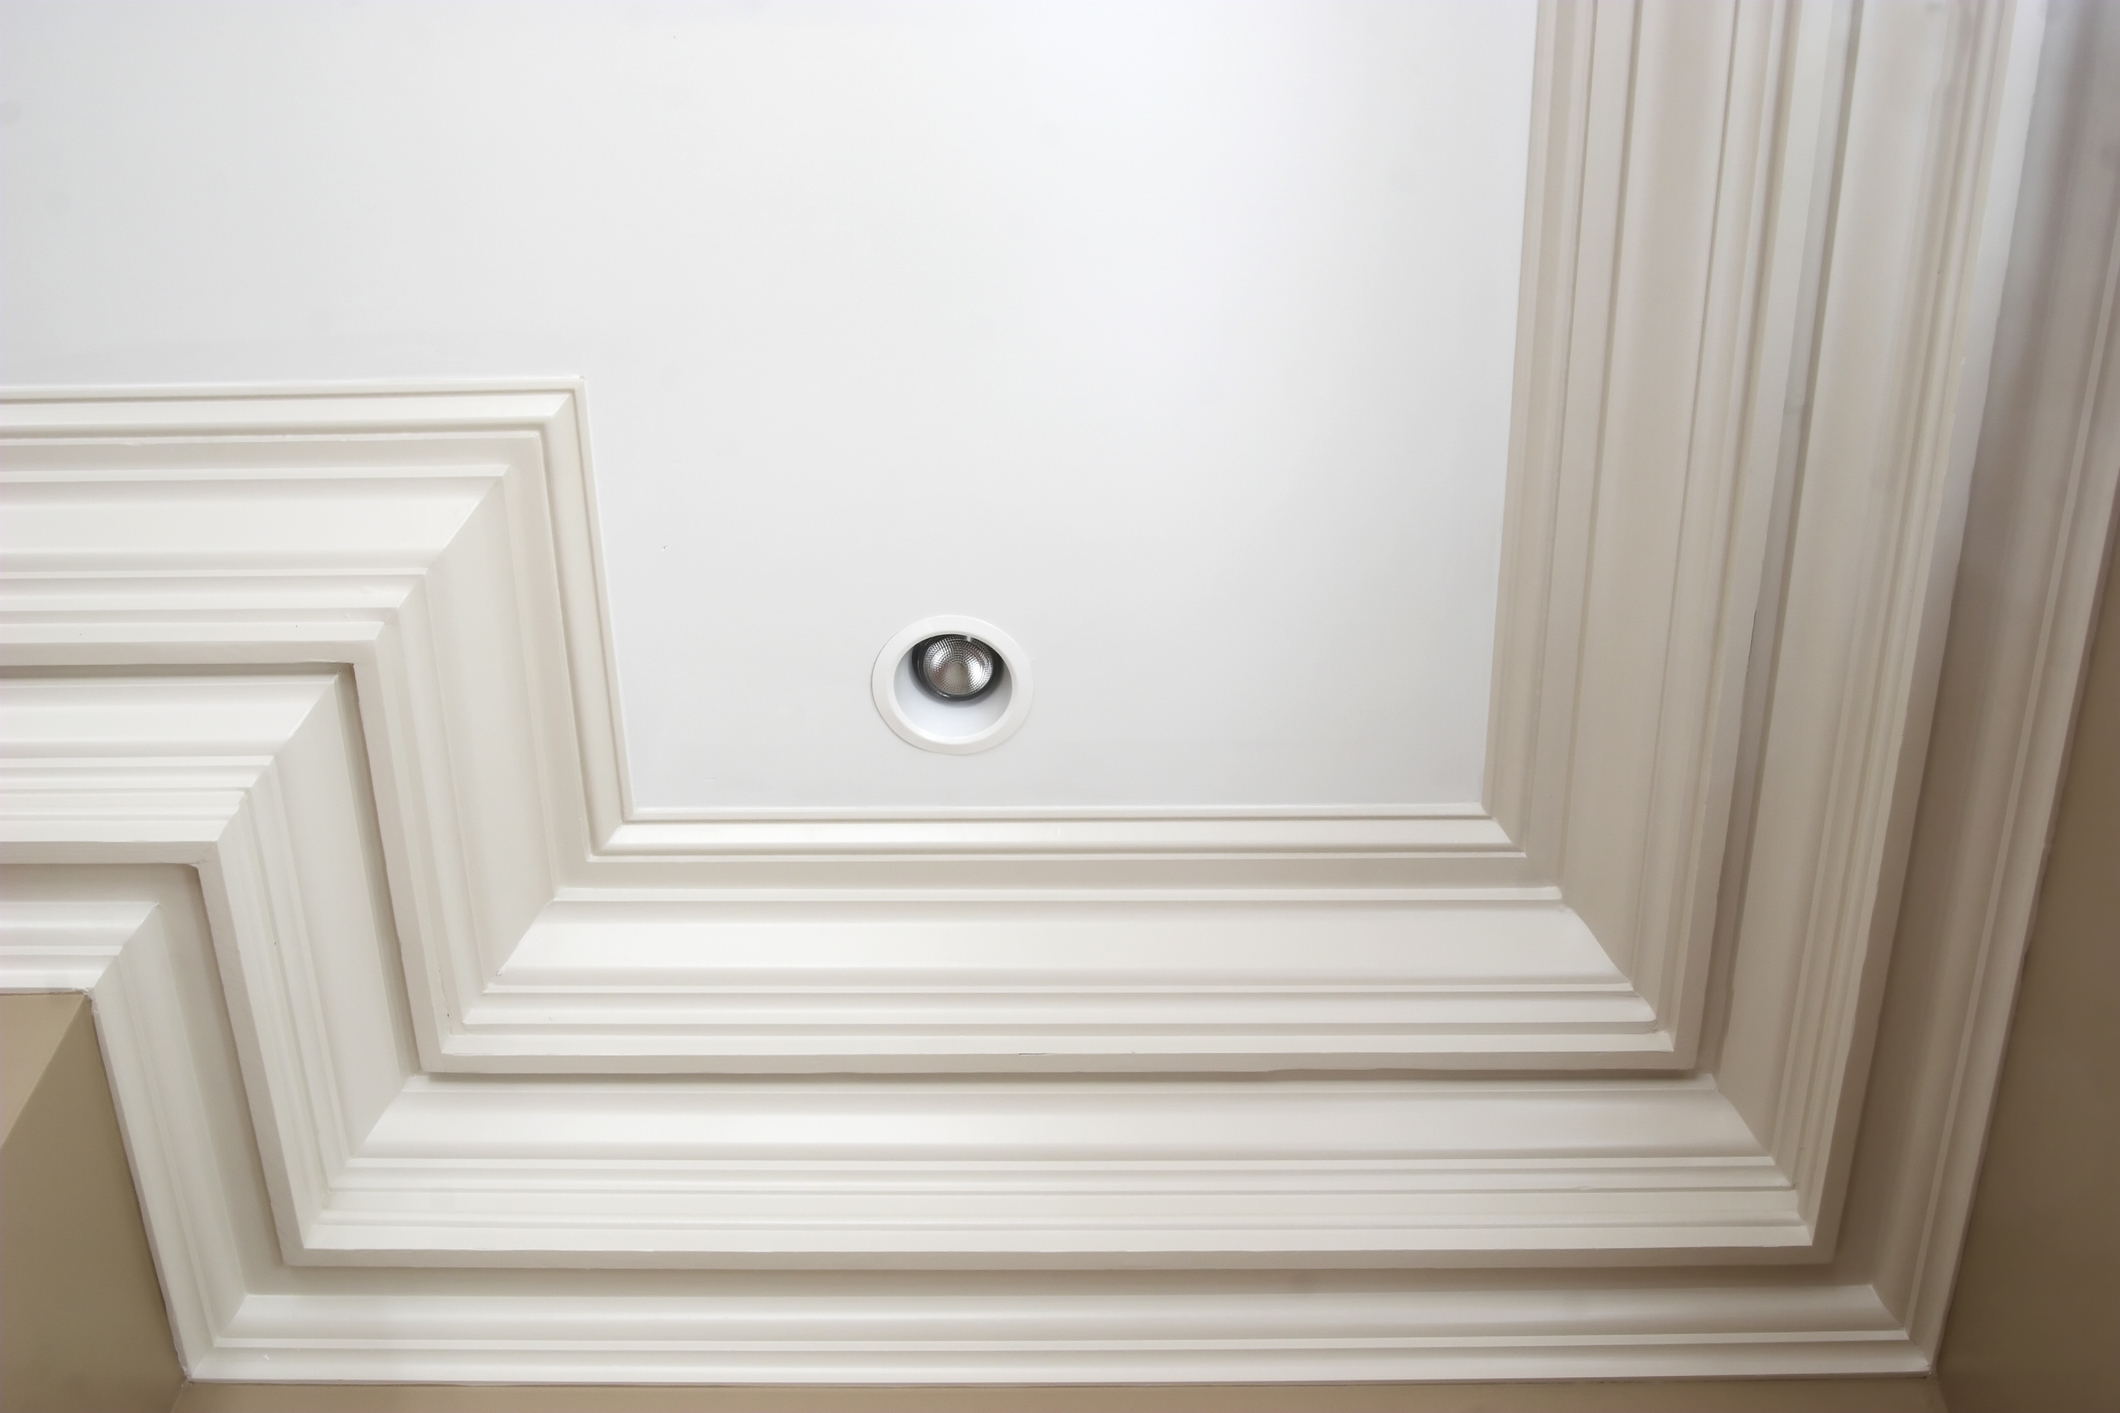
Photo by Wollwerth Imagery on Adobe Stock


